Request Deployment
Overview
A deployment request is a controlled way to deploy a project version to a device. Instead of writing to the device immediately, the request records what should be deployed, who asked for it and why, and then waits for someone with approval rights to approve it. Only after approval, and only within the approval window, can the deployment be executed.
This gives you a four-eyes principle on production equipment: the engineer who prepares a change and the person who authorises it are not required to be the same, and every step is recorded for audit.
Requests are managed on the Deployments tab of a device, under Requests. The Jobs view next to it shows the deployment executions themselves, described on the Deployments page.

Creating a Request
Step 1 – Choose the Version and Describe the Change
Select Request deployment and fill in the first step of the dialog.
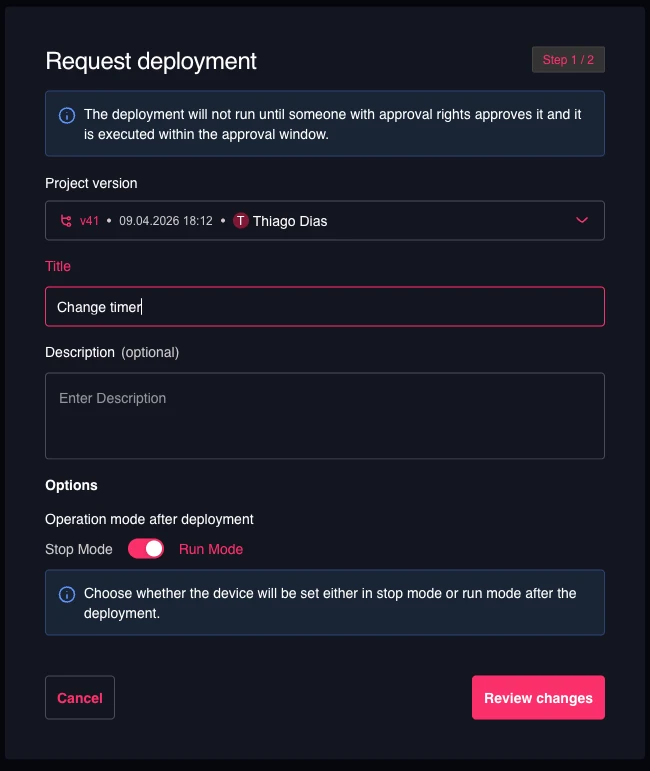
| Field | Description |
|---|---|
| Project version | The project version to deploy. The list shows the version number, the date it was created and its author. |
| Title | Required. A short summary of the change, shown in the request list and in the notification sent to approvers. |
| Description | Optional. Background for the approver — what changed and why. |
| Operation mode after deployment | Whether the device is set to Stop Mode or Run Mode once the deployment completes. |
Select Review changes to continue.
Step 2 – Review the Changes
The second step shows exactly what the deployment will change on the device before you commit to the request.
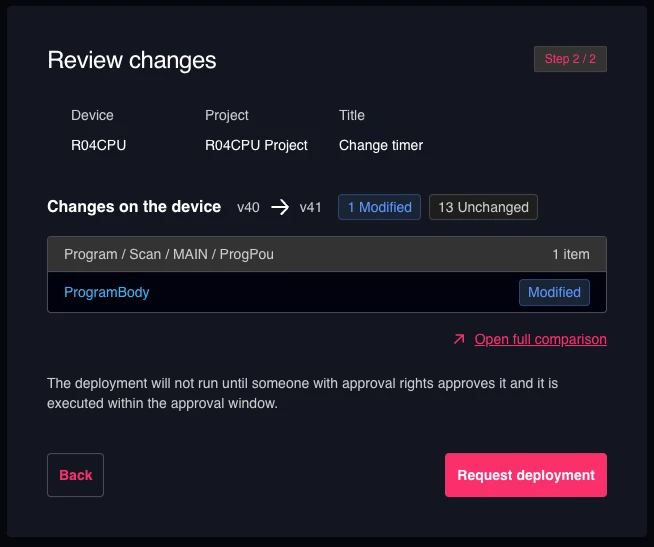
The summary repeats the device, the project and the title, and compares the currently deployed version with the target version. Changed objects are counted as Modified and Unchanged and listed by their path in the project, for example Program / Scan / MAIN / ProgPou. Open full comparison opens the complete side-by-side comparison of the two versions.
Select Request deployment to submit. Select Back to return to the first step and adjust your entries.
After Submitting
The request appears in the Requests list with the status Requested, and everyone with approval rights for that device is notified.

The list shows the title, status, description, project, version, who requested it and the creation time. Expires at and Executed at stay empty until the request is approved and executed.
Request Statuses
| Status | Meaning |
|---|---|
| Requested | Submitted and waiting for an approver. |
| Approved | Approved and ready to execute, until the approval window expires. |
| Denied | An approver rejected the request. It cannot be executed. |
| Canceled | The requester withdrew the request before it was executed. |
| Executed | The deployment was started from the approved request. |
| Expired | The approval window passed without execution. A new request is required. |
Being Notified of the Decision
When an approver decides on your request, you are notified through the channels configured in your Deployments notification category.
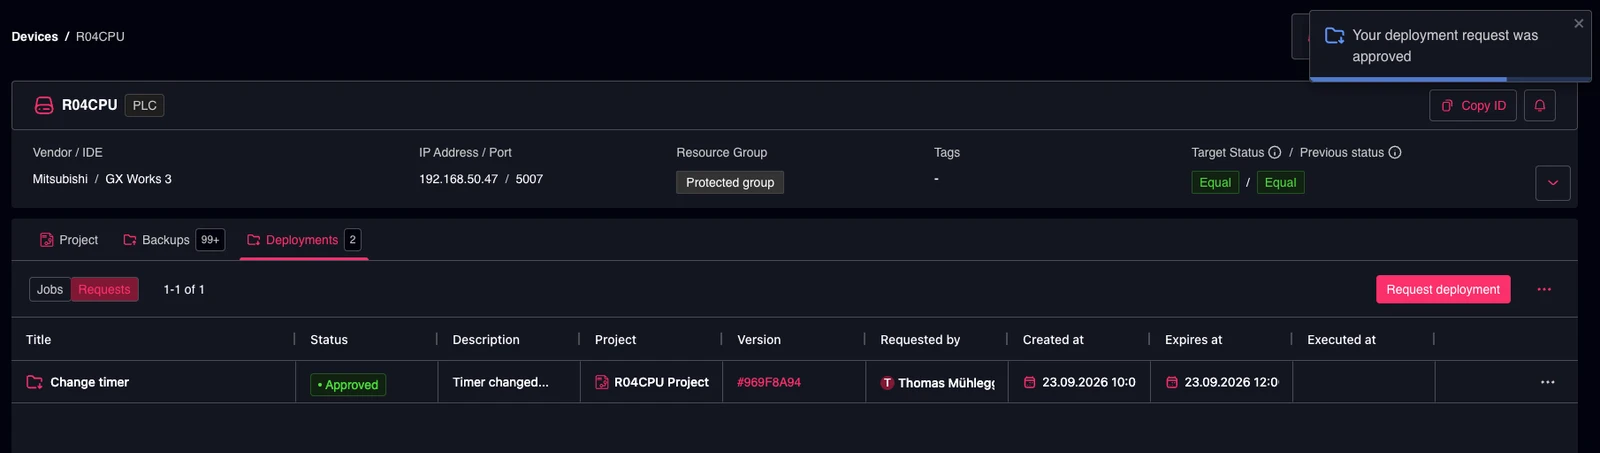
The request now shows Approved together with Expires at, the end of the approval window. To change how and whether you receive these messages, see Notifications.
Executing an Approved Request
Open the approved request to execute it. The detail view repeats who requested it, the device, the project and the version, and shows both Created at and Expires at.
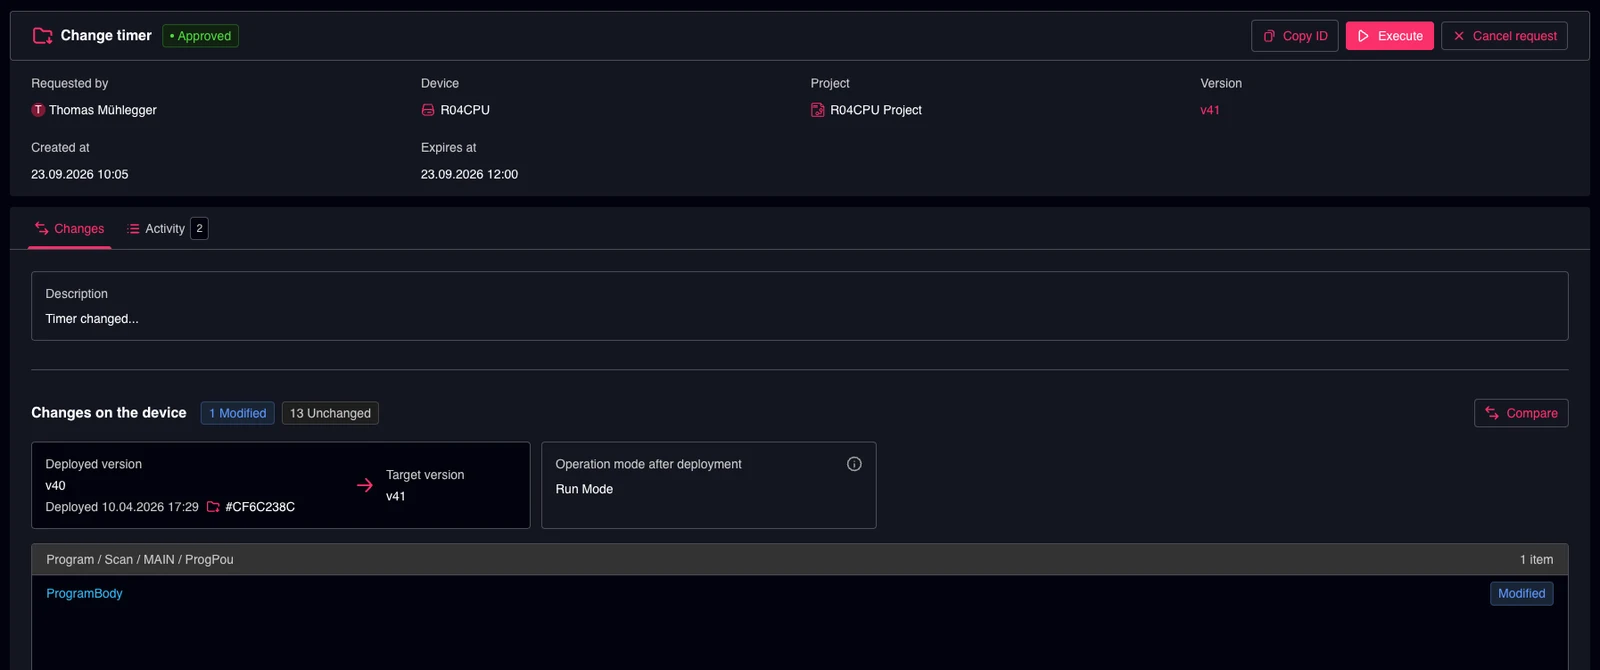
The Changes tab shows the description, the deployed and target versions, the operation mode that will be applied after the deployment, and the list of modified objects. Compare opens the full comparison. The Activity tab records every step in the life of the request — creation, approval with the approver's comment, and execution.
- Execute – starts the deployment. It runs like any other deployment and appears under Jobs with its own execution log.
- Cancel request – withdraws the request without deploying.
The deployment must be executed before Expires at. Once the window has passed, the request expires and a new one has to be raised.
Use Cases
- Deploying to production equipment where a second person has to authorise every change.
- Documenting the reason for a change together with the change itself, for audit and change-management records.
- Letting an engineer prepare and review a deployment while a shift lead decides when it may run.
- Restricting a deployment to an agreed maintenance window through the approval window.
Find out More
- Approve Deployment — reviewing and deciding on a request.
- Deployments — the deployment history and direct execution.
- Notifications — configuring deployment notifications.