Step 1: Creating a Gateway
Creating a Gateway
Step 1: Navigate to Gateway Management
- Log into the SDA Console at https://app.eu1.sdaconsole.io/
- In the left navigation panel, click on Devices & Gateways
- Click on View and select Gateways from the dropdown menu
%20(1).webp)
Navigate to the Devices & Gateways section in the left sidebar
%20(1).webp)
Select Gateways from the View dropdown to manage your connectivity gateways
Step 2: Declare a New Gateway
- Click the Add Gateway button to create a new connectivity gateway
- Fill in the required information to properly describe your gateway:
- Gateway Name: Choose a descriptive name that identifies the gateway's location or purpose
- Description: Provide additional context about the gateway's role in your network
- Location: Specify the physical location where the gateway will be deployed
- Tags: Add relevant tags for better organisation and filtering (highly recommended)
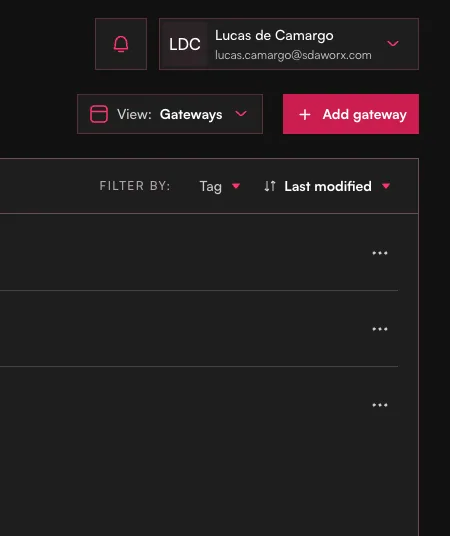
Click Add Gateway to begin creating a new connectivity gateway
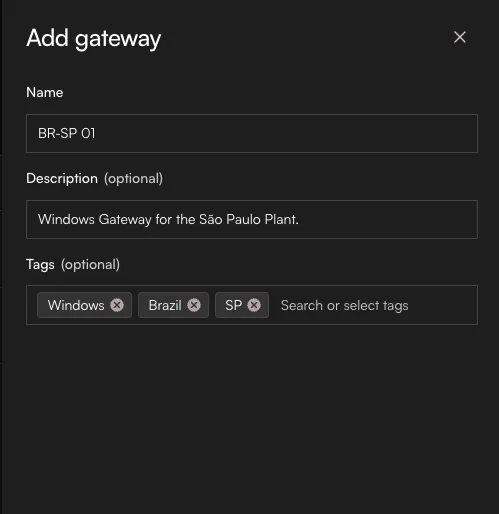
Enter comprehensive information to properly identify and describe your gateway
Best Practice: Use consistent naming conventions and meaningful tags to simplify management as your infrastructure scales. Tags are particularly useful for grouping gateways by location, department or function.
Step 3: Verify Gateway Creation
After completing the gateway creation process, the new gateway will appear in the gateways listing, ready for device linking and deployment.
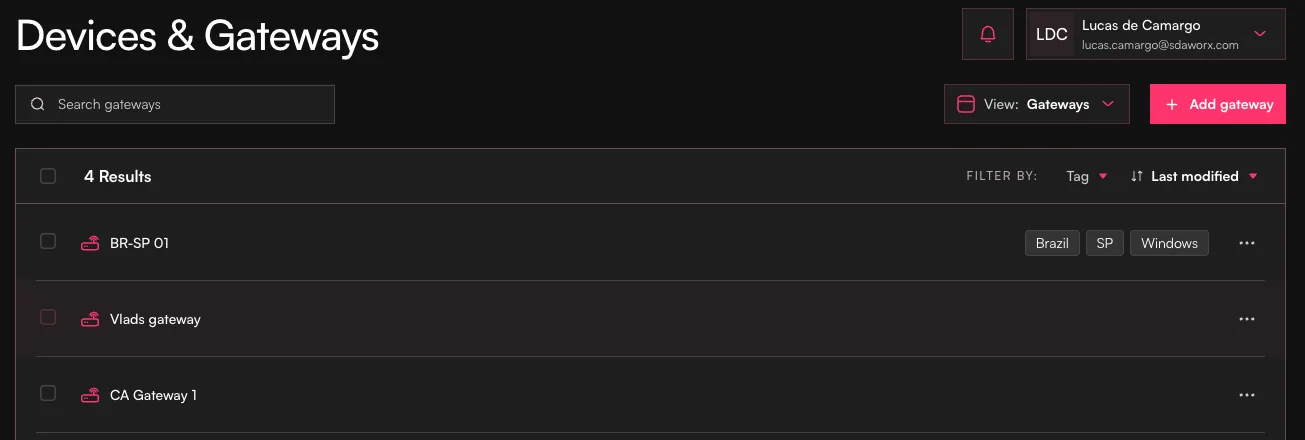
Linking Devices
Step 1: Create a New Device
- Return to Devices & Gateways in the left navigation panel
- Click View and select Devices
- Click Add Device to begin creating a new industrial device entry
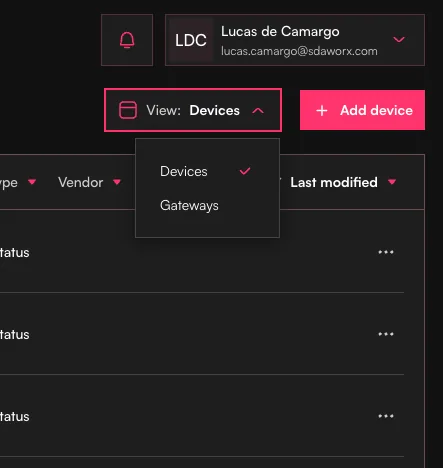
Switch to the Devices view to manage your industrial assets
Step 2: Configure Device Properties
- Device Description: Enter comprehensive details about the device:
- Device Name: Use a clear, descriptive identifier
- Description: Document the device's purpose and location
- Vendor: Select the appropriate manufacturer from the dropdown menu
- IDE Version: Choose the correct version of the programming environment or firmware
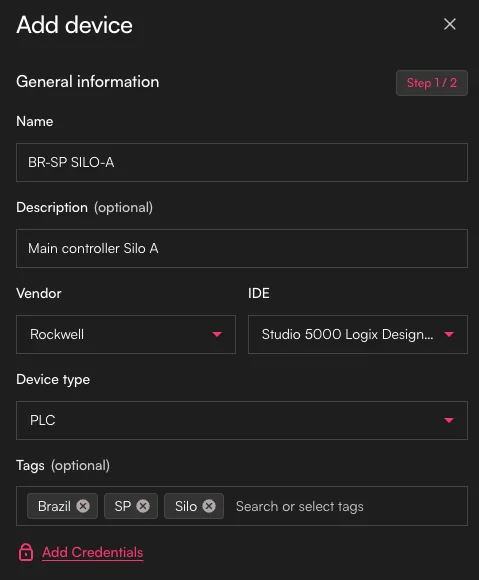
Provide detailed information about the device for proper identification
Step 3: Configure Network Settings
- IP Address Configuration: Enter the device's IP address as seen from the Gateway's perspective
- Important Considerations:
- If Network Address Translation (NAT) exists between the device and gateway, use the translated IP address
- Ensure the IP address is reachable from the gateway's network segment
- Document any special routing requirements in the device description
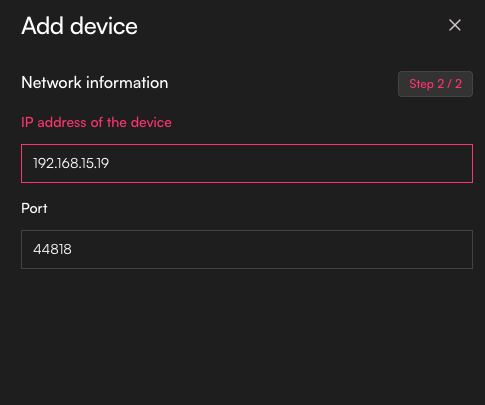
Configure the network settings using the IP address visible to the gateway
Critical Note: The IP address must be exactly as the Gateway will see it. If your device has IP address 192.168.1.100 on the local network, but the Gateway accesses it through a NAT that translates it to 10.0.0.100, you must enter 10.0.0.100 in the SDA Console.
Step 4: Link Device to Gateway
- Navigate back to the Gateways view
- Select the gateway you created earlier
- Click Link Device
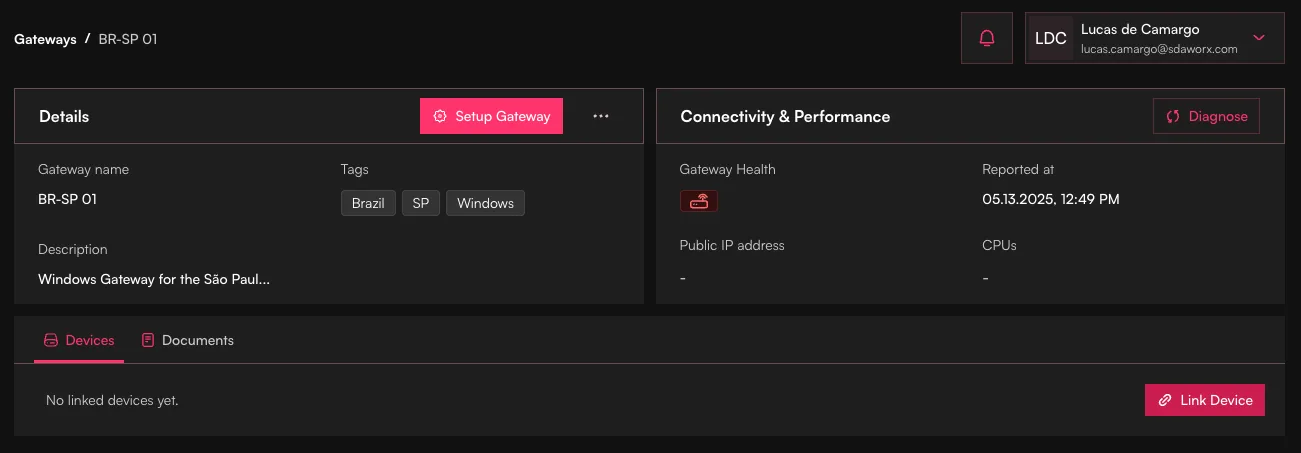
Select your gateway and initiate the device linking process
- Choose the device you just created from the available device list
- Click Link to establish the connection
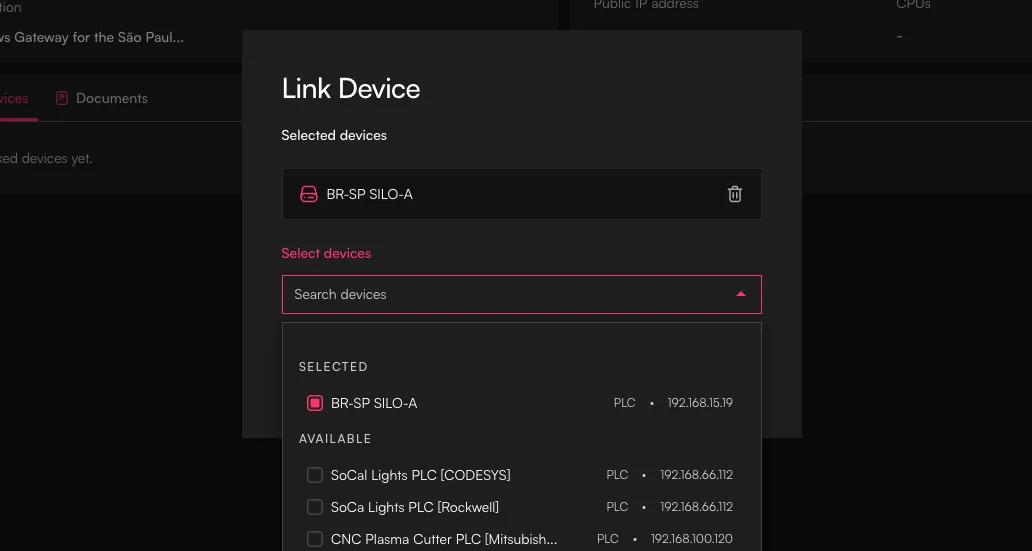
Choose the appropriate device and confirm the linking operation
Verification
Once you've completed these steps:
- Verify Configuration: Ensure your gateway appears in the listing with the correct linked devices
- Review Network Settings: Double-check that all IP addresses are correctly configured from the gateway's perspective
- Prepare for Gateway Installation: Your SDA Console configuration is now ready for the physical gateway deployment
The gateway and device configuration in the SDA Console serves as the foundation for establishing secure connectivity. The next phase involves installing and configuring the SDA Glue service on your chosen gateway hardware, which will use this configuration to establish secure tunnels to your industrial devices.