Custom Fields
Overview
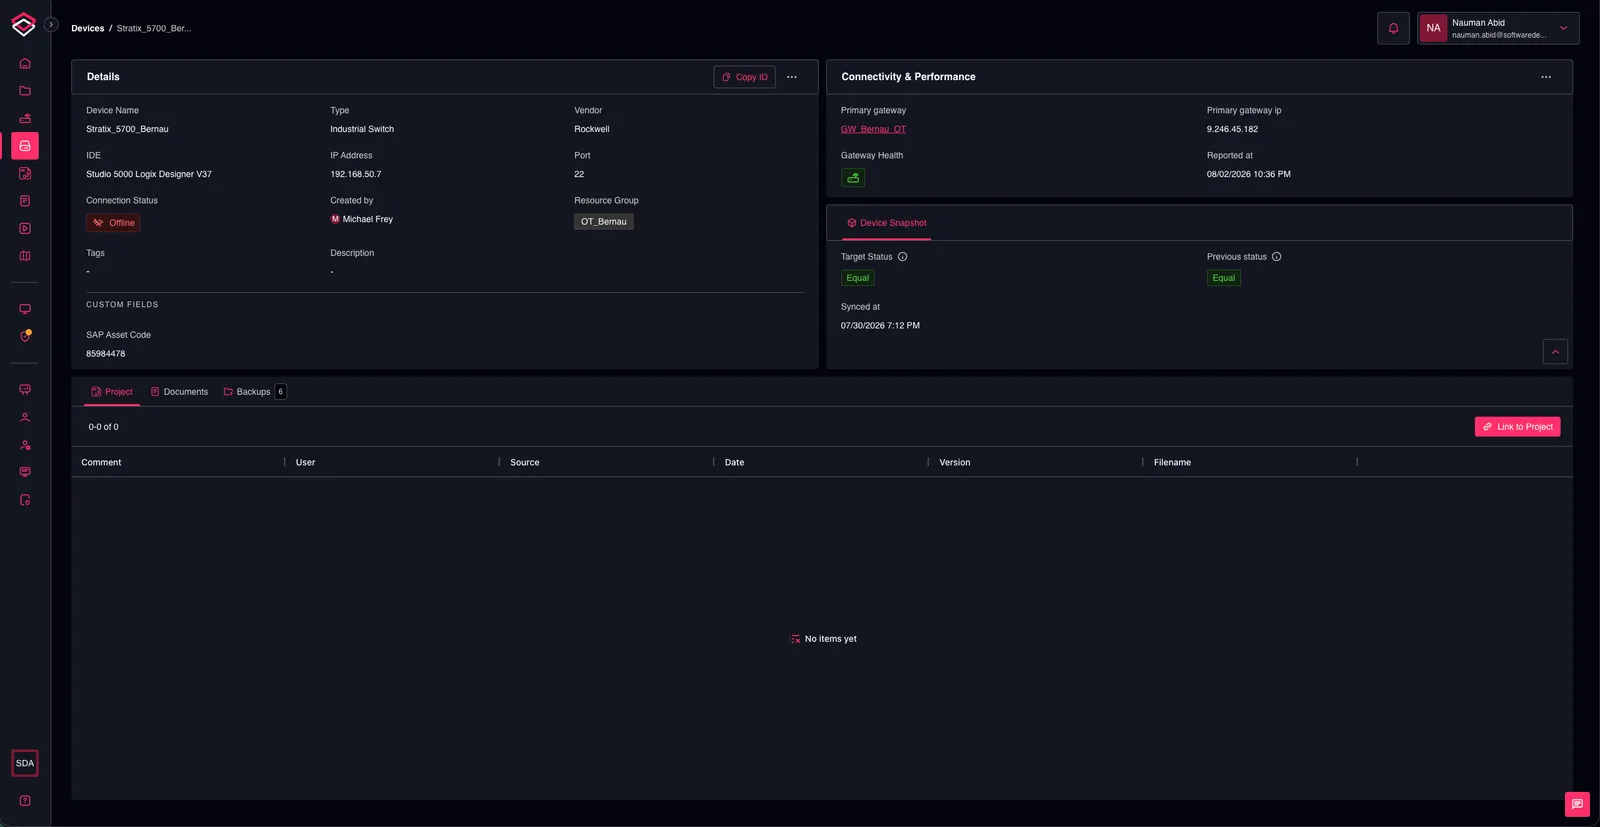
Custom fields allows tenant admins to define additonal custom fields on top of the platform's existing asset properties. Once a custom field is created and linked to one or more asset types, it appears whenever those assets are created, edited, and viewed.
Purpose is to allow organization(s) to capture the extra information that matters to them (e.g. an internal asset tag, a warranty-expiry date, a cost center) without needing a platform change.
Where to find it
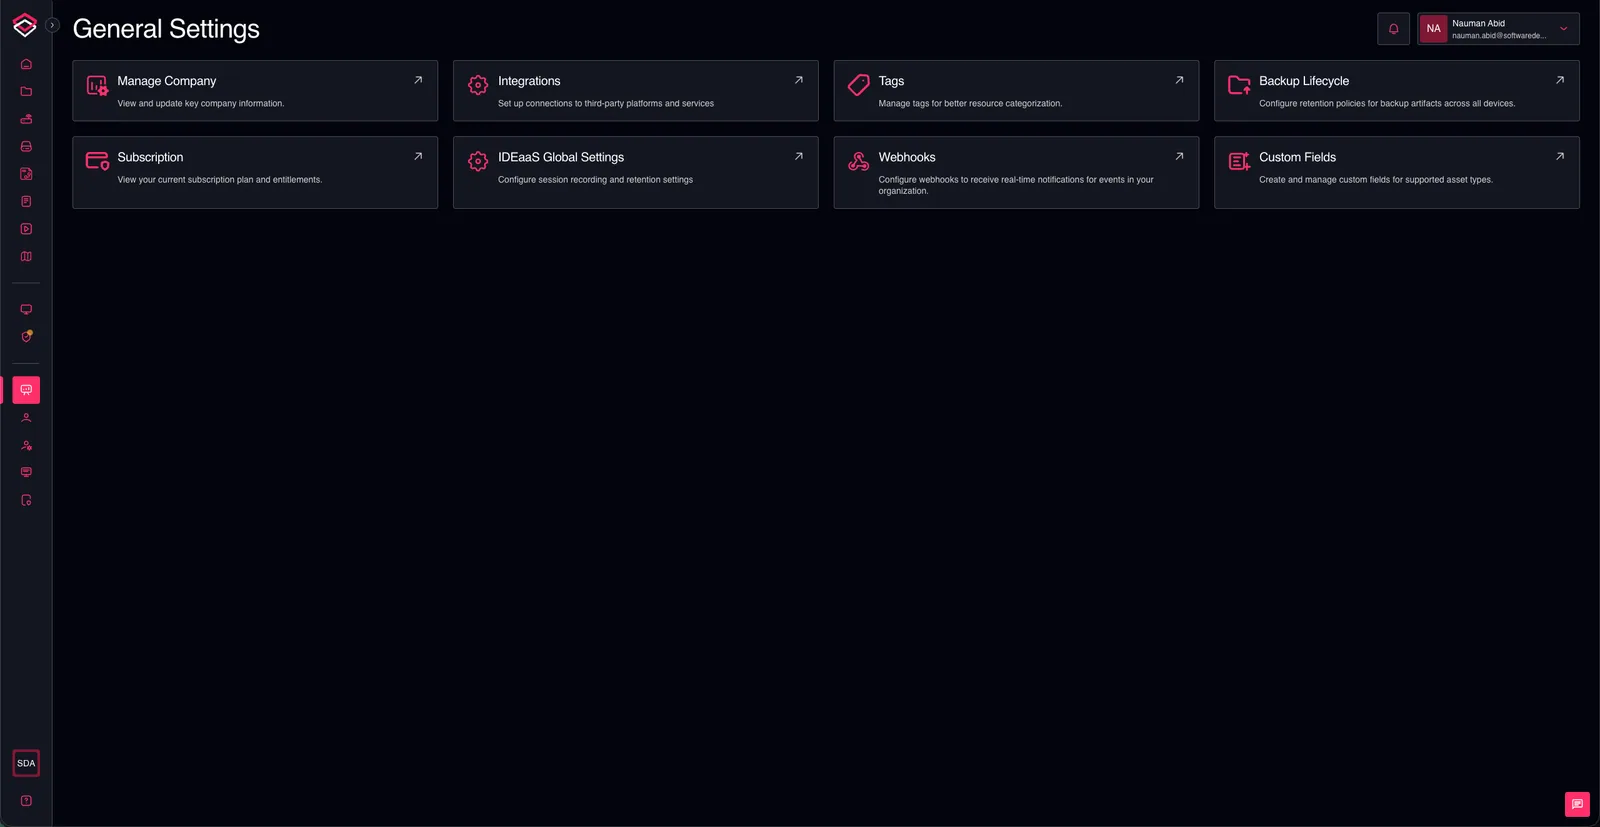
Console → General Settings → Custom Fields
Supported Field Types
Below is a list of supported field types and their configuration options:
| Type | Description | Extra configuration |
|---|---|---|
| Text | Single-line free text | Placeholder, help text, min/max length |
| Long Text | Multi-line free text | Placeholder, help text, min/max length |
| Number | Numeric value | Placeholder, help text, min/max value |
| Date | Calendar date (no time component) | Allow past date / allow future date |
| Boolean | Toggle (yes/no) | — |
| URL | Text validated as a URL | Placeholder, help text |
| Single Select | One choice from a predefined list of options | Options list |
| Multi Select | One or more choices from a predefined list of options | Options list |
Important: Default values can be set for all field types. For select fields, the default value must be one of the options in the list.
Supported Asset Types
Below is a list of supported asset types that custom fields can be linked to
- Devices
- Gateways
- Projects
- Documents
- Licenses
- Workstations
- Vaults
- Secrets
- Tags
Creating a Custom Field
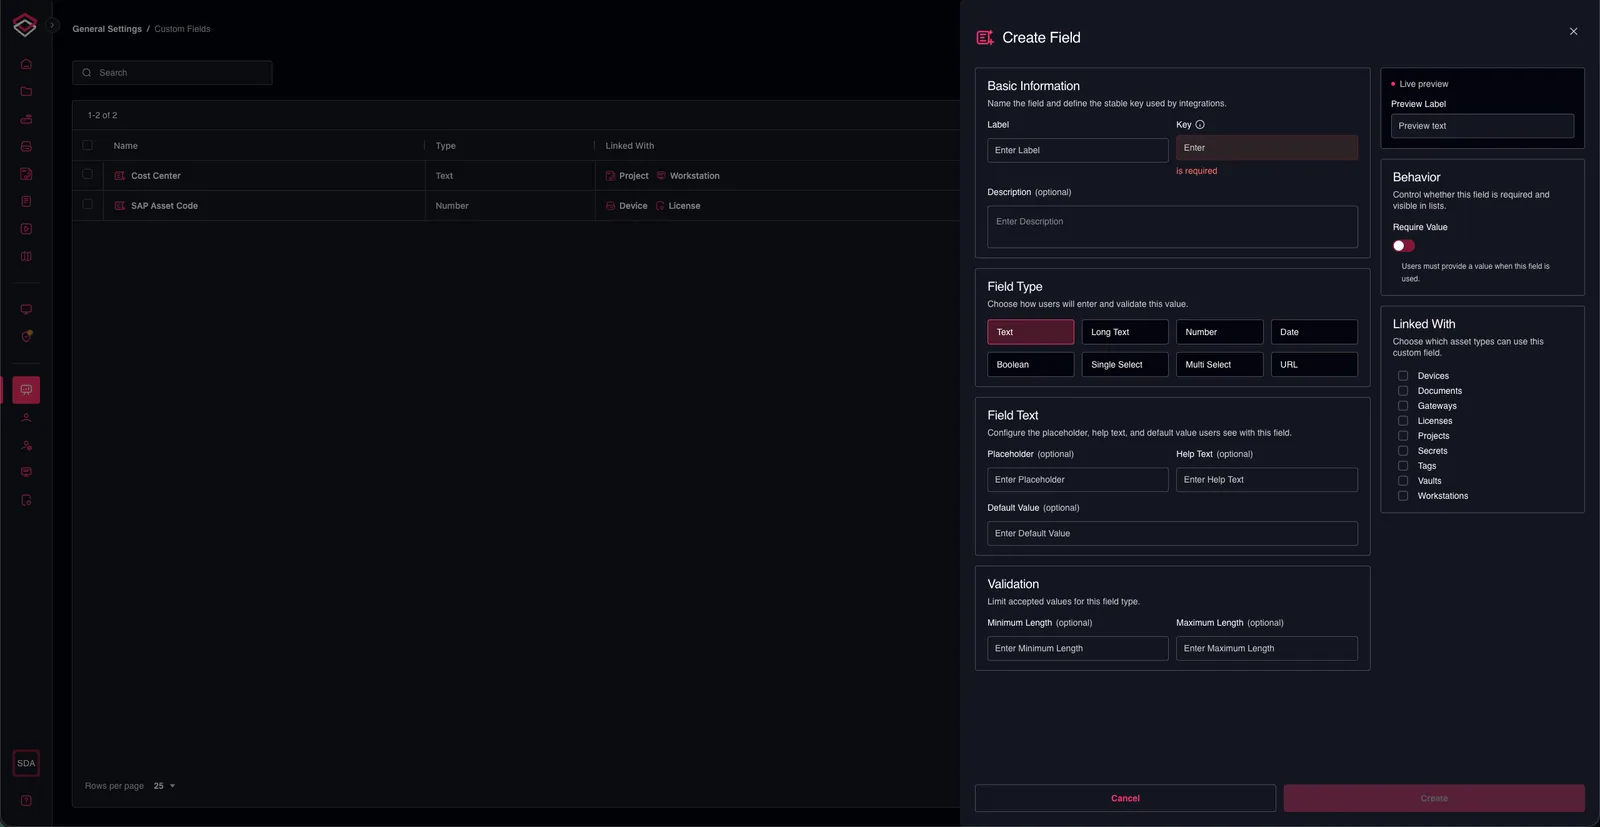
- Navigate to Console → General Settings → Custom Fields.
- Click Create Field.
- Basic Information:
- Enter a Label for the field. This is the name that will be displayed to users.
- Key is automatically generated based on the label, and connot be edited.
- Enter Description (optional). This is a brief explanation of the field's purpose.
- Field Type:
- Select the type of field you want to create from the supported field types list.
- Field Text:
- Configure the field's settings based on the selected type. This may include placeholder text, help text, default value.
- Options (for select fields only):
- Add the options that users can choose from. You can add multiple options, and set a default option if required.
- Validation:
- Set any validation rules for the field, such as minimum/maximum length for
text fields, or minimum/maximum value fornumber fields. - For
date fields, you can specify whether past or future dates are allowed.
- Set any validation rules for the field, such as minimum/maximum length for
- Behavior:
- Choose whether the field is Required or Optional.
- Once this option is set, it cannot be changed later.
- Linked With:
- Select the asset types that this field should be linked to. The field will appear on the forms and details pages for these asset types.
- Click Create to create the custom field.
We render the preview of the field in real time as you configure it, so you can see exactly how it will look to users.
Important: Once a field is created, it is by default Active and will be visible to users on the linked asset types. You can change the status to Inactive later if needed using the field's edit options.
Updating a Custom Field
- Navigate to Console → General Settings → Custom Fields.
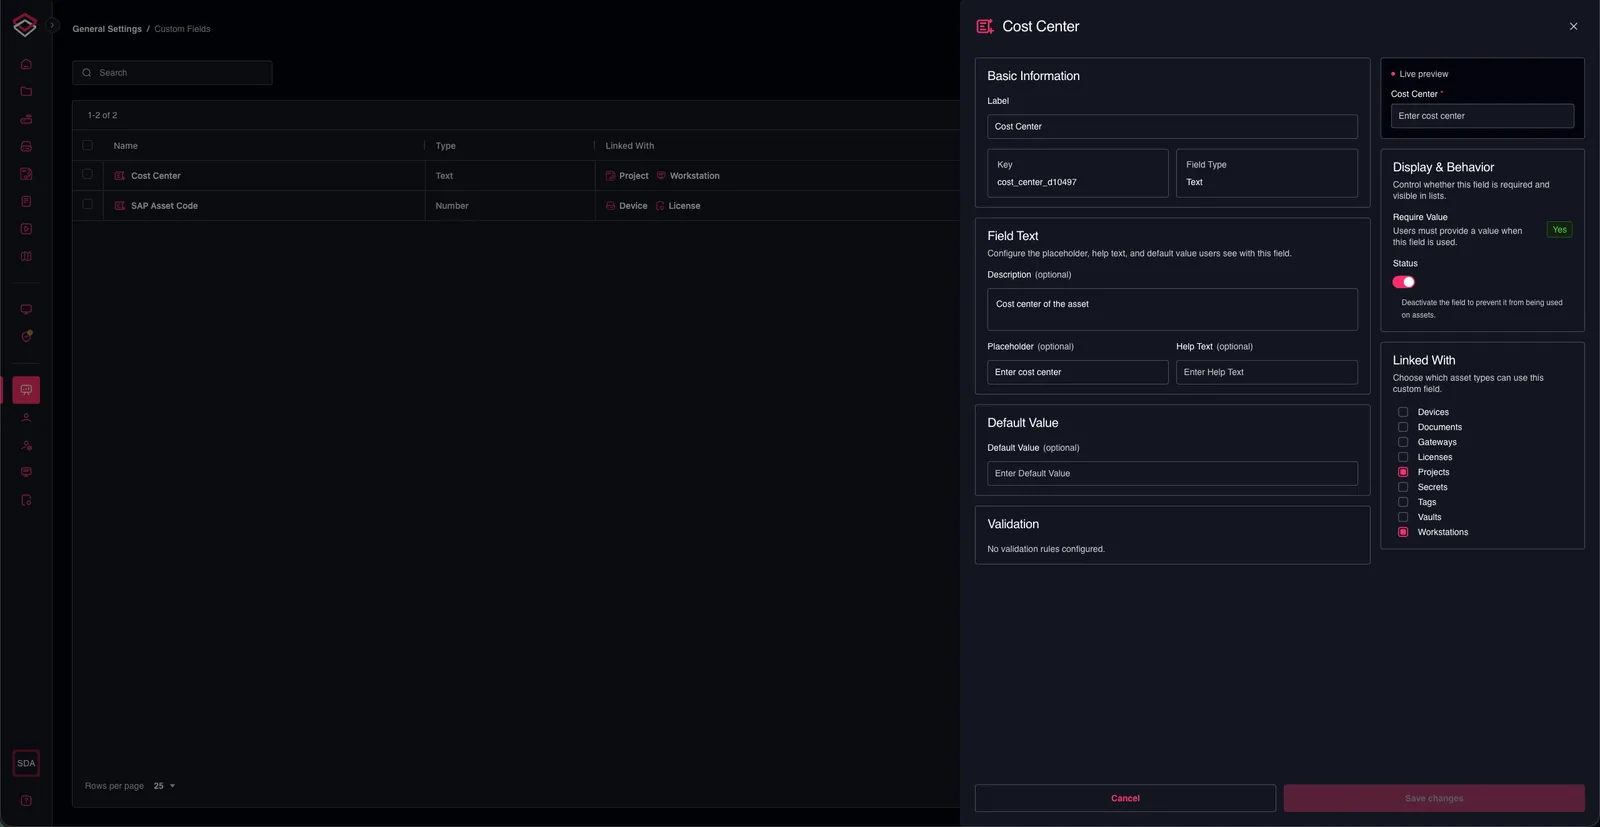
- Click on the name of field you want to update.
- Update the field's settings as required. You can change the
- Label
- Description
- Placeholder text
- Help text
- Default value
- Linked asset types
- Status (Active / Inactive)
- Click Save Changes to apply the changes.
Activating / Deactivating
You can change the status of a custom field to Active or Inactive. Deactivating a field hides it from the forms and detail pages and also remove its associations with linked asset types, but does not delete the field or its stored data. You can reactivate the field and attach it to asset types again at any time.
In addition to the edit form, you can also change the status of a field from the list view using the row checkboxes and Activate / Deactivate bulk actions.
- Navigate to Console → General Settings → Custom Fields.
- Select one or more fields using the row checkboxes.
- Click Activate or Deactivate to change the status of the selected fields.

Linking / Unlinking Custom Field
You can link or unlink a custom field to/from one or more asset types. This can be done from the edit form of the field, or in bulk from the list view.
- Navigate to Console → General Settings → Custom Fields.
- Select one or more fields using the row checkboxes.
- Click Link with or Unlink from to attach or detach the selected fields from a chosen asset type.
Important: You cannot link a field to an asset type if it is not active. You must first activate the field before linking it to an asset type.
How Custom Fields Appear on Assets
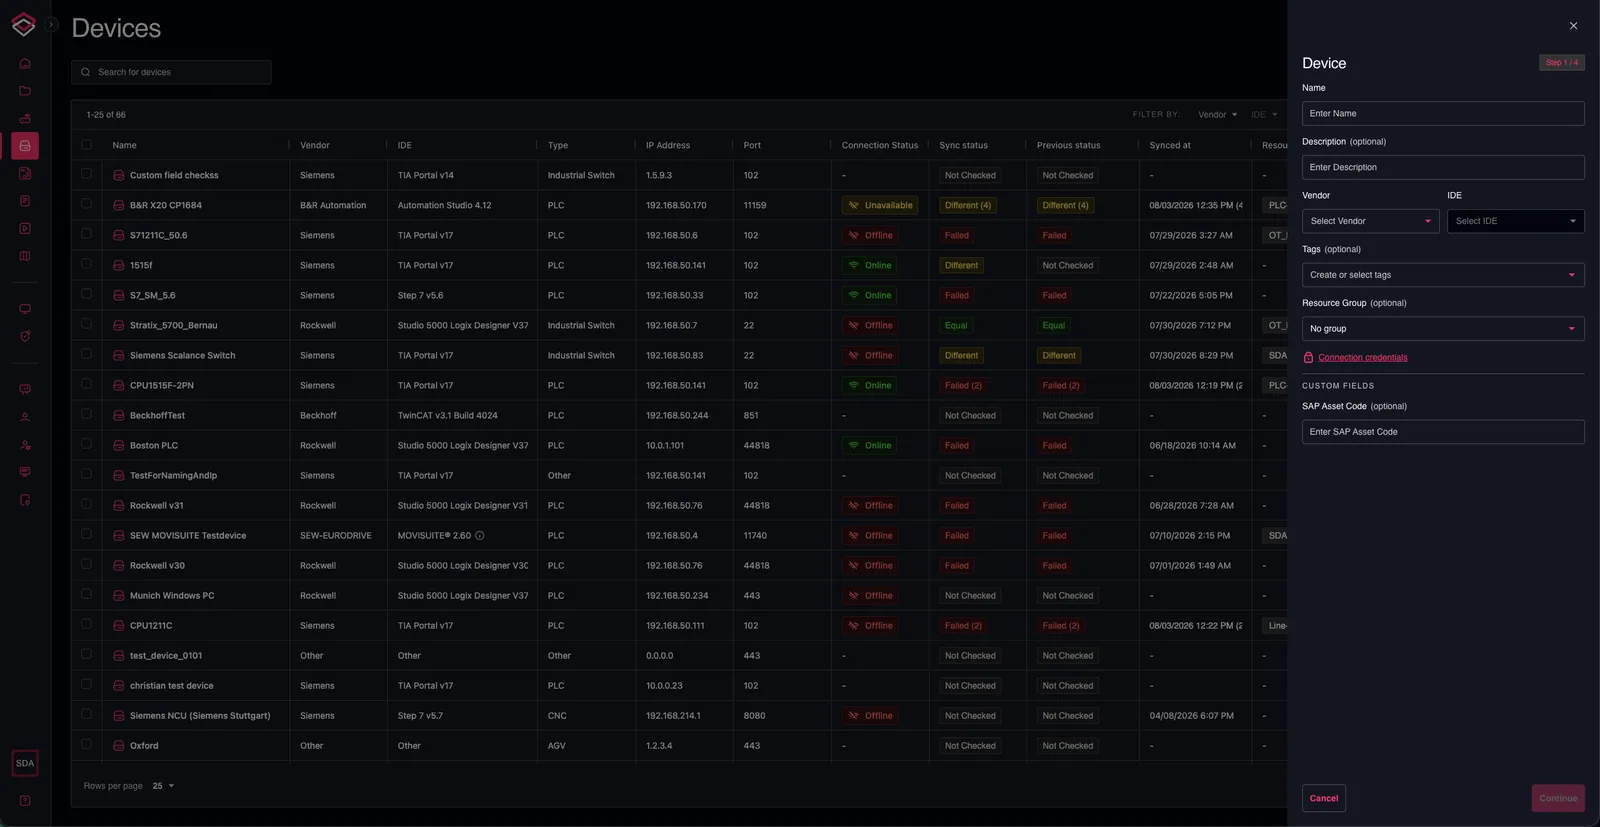
Once linked, a custom field shows up in two places for its asset type:
- Create / Edit forms — a Custom Fields section is appended to the form where users fill in a value for each active, linked field. Required fields must be filled in to submit.
- Asset detail page — a Custom Fields section shows the saved values, alongside the asset's other details. This section appears only in full detail views not the compact one.